Valentine’s Day is around the corner and paper crafting is having a major moment this dull, grey winter. So let’s master how to make a paper rose that you can use to decorate cards and gifts for Valentine’s Day or any time of the year. (Roses are beautiful all year round!)
Once you learn how to make paper roses, you can use them for a number of crafting purposes such as decorating photos, embellishing scrapbook or journalling pages, or even making a bunch of them for a shadow box to hang up as home decor. Here I’m demonstrating how to use paper roses to seal pocket sized gift bags.
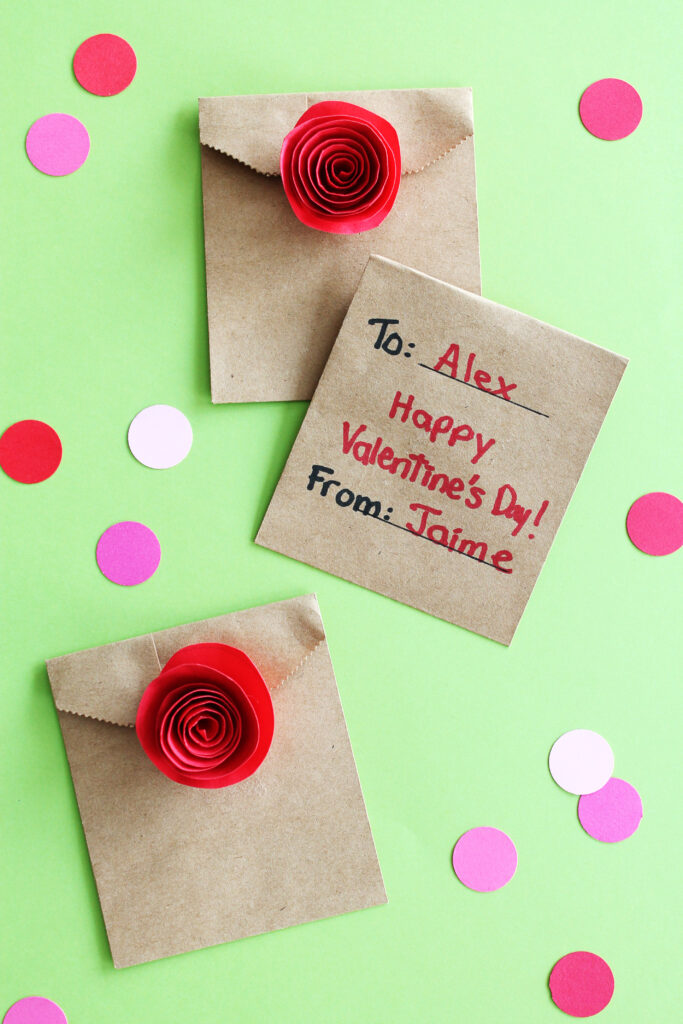
Paper Rose Valentine’s Day Bags for the Classroom
These paper roses are less than 2 inches in size which makes them perfect for classroom Valentines. For grade school aged children, these paper rose Valentine’s Day bags can be a fun little project they can work on by themselves. Inside each little paper baggie, you can put all kinds of fun things for children such as:
- Stickers or washable tattoos
- Jokes printed on small sheets of paper to fit in the bag
- Small mazes or crossword games
- Gum, candy or a favorite treat, like a single cookie
- A heart shaped balloon that they can inflate themselves at home
Materials
- Red paper (I happened to use cardstock because it’s what I had but I think it would be easier for younger children if red computer paper or construction paper was used.)
- Pencil
- Scissors
- Bamboo skewer (optional)
- Hot glue (or white glue but it’s more work because it takes time to dry)
If you’re making the paper roses to seal Valentine’s Day bags for the classroom, then you’ll also need:
- Mini paper bags
- Double sided tape
- Markers
- Goodies to fill the bags
Steps
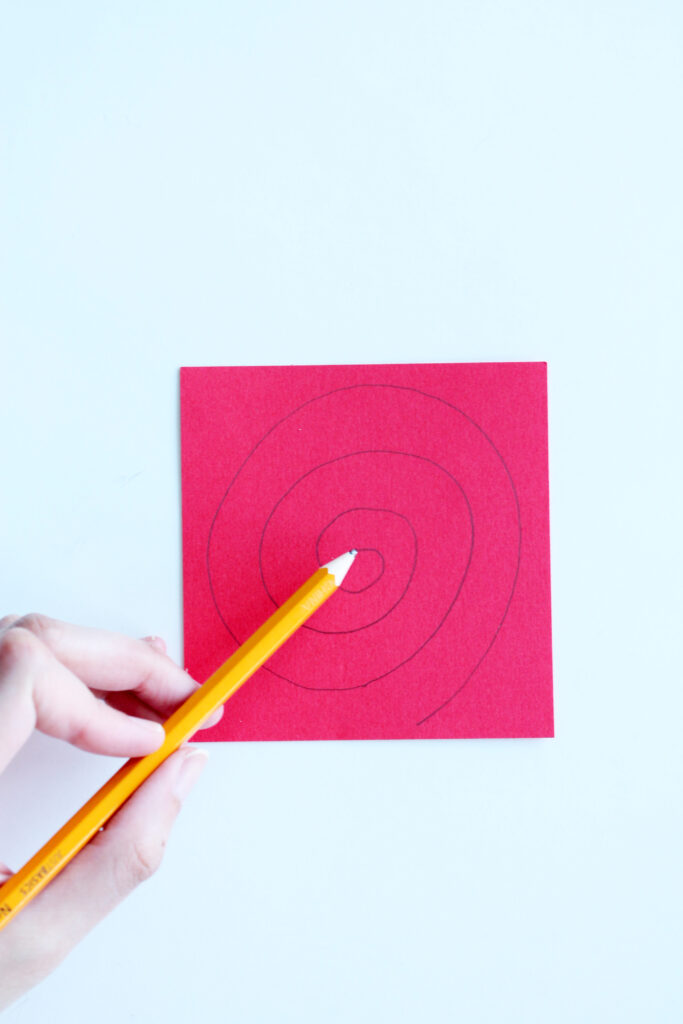
1. Draw a spiral on a piece of paper. Here I used a 4″x4″ pre-cut square of red cardstock. If you can’t find pre-cut squares of paper, you can cut the squares yourself.

2. Cut out the spiral. Discard the square ends.
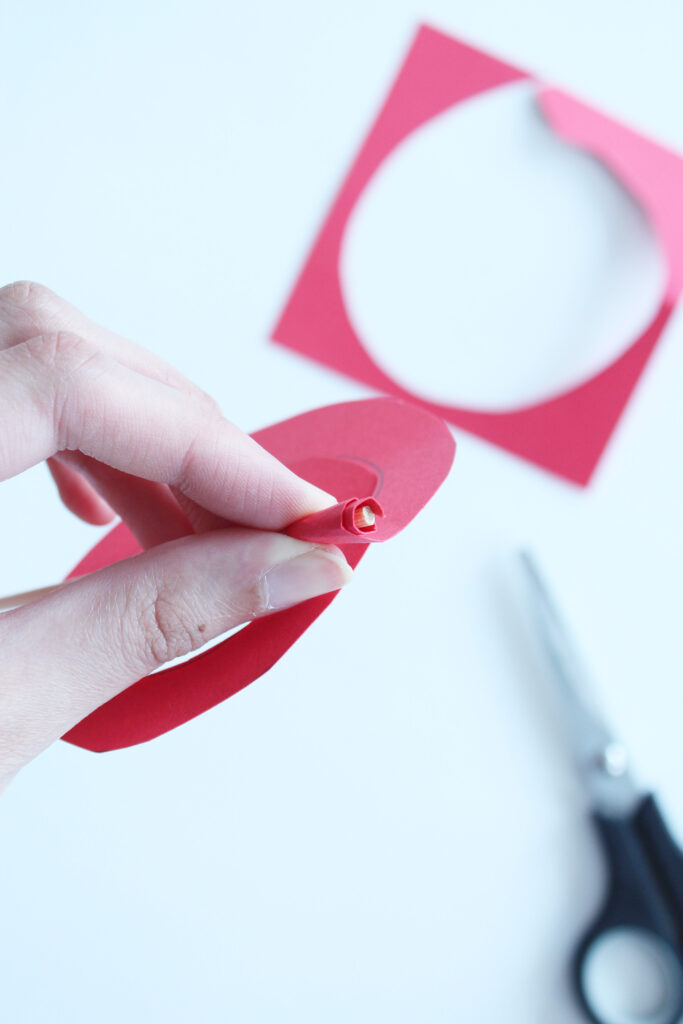
3. Begin rolling the spiral. Wrapping the paper around the bamboo skewer helps with this. A pencil can be too thick leaving a large void in the centre. However, you can cover up the void with a small pompom or bead, if you wanted to go for that kind of look.
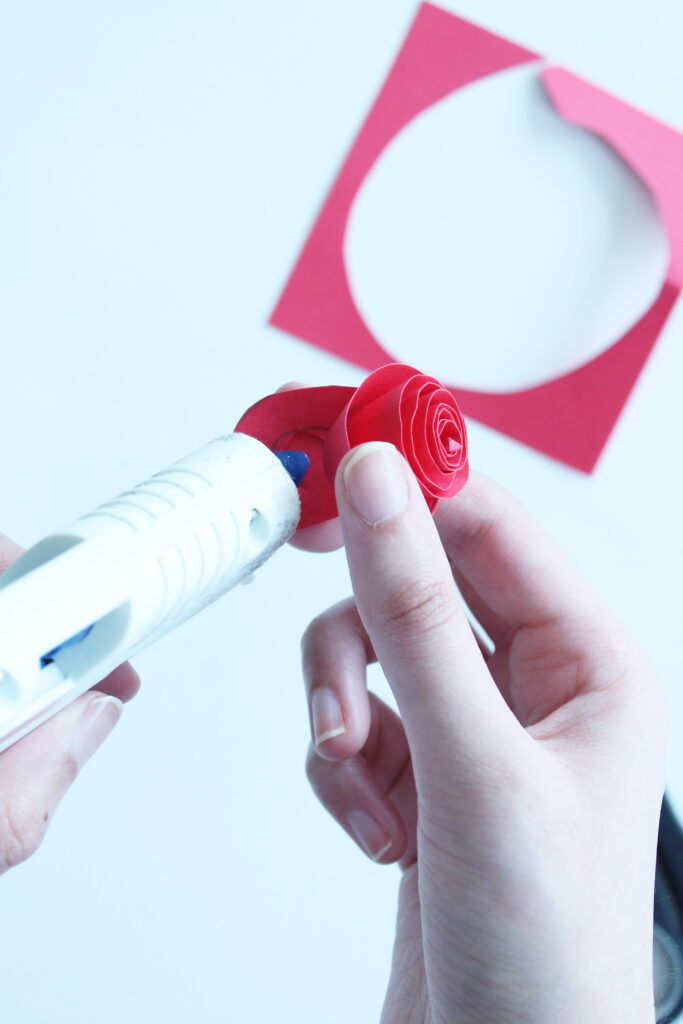
4. Once you’ve rolled the whole spiral, gently allow the coils to open up a bit (this should automatically happen when you release the flower from your fingers.) Hot glue the bottom of the rose so that the coils stay in place. Now you have a paper rose!
5. If you’d like to use your rose to seal paper bags, like I’ve shown in the picture, write your greetings on one side of the paper bags.
6. Fill up the baggie with your choice of goodies. Tape down the flap using double sided tape and then seal the bag with the paper rose by using another piece of double sided tape.
Did you make this DIY of ours? We’d love to see it! Share with us on Instagram or Facebook @helloholydays.
If you make this DIY and share photos of your version on your own blog, please include a link back to this page as your source of inspiration and tag @helloholydays on all social media.
If you prefer to purchase Valentine’s Day cards rather than craft them, check out my shop for greeting cards perfect to express love on Valentine’s Day or anytime of the year.
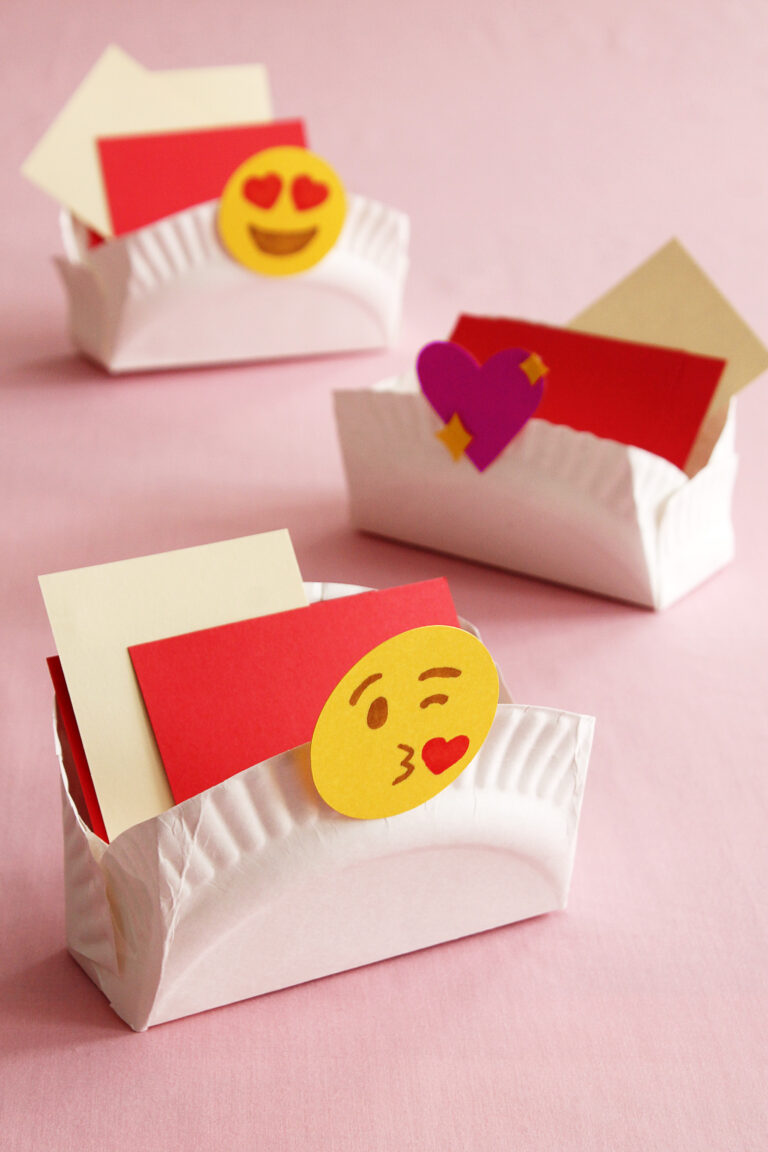
Want more Valentine’s Day crafts? Check out our list of Valentine’s Day Crafts.
This craft was first created by Manal Aman for marthastewart.com before being republished on Hello Holy Days!