If you go to a specialty Eastern European grocery store this time of year, you’re bound to find some wooden Easter eggs for sale. These wooden Easter eggs are naturally beautiful in all their rustic galore.
But, you may find them a challenge to decorate. That’s because when you paint them or dye them, the colors are kind of…off. Unless you do multiple coats (which takes a lot of time), the colors come out pretty dark which I find puts a bit of a damper on spring. I associate springtime with brighter, happier colors.
If you don’t like dark colored Easter eggs either, I wouldn’t bother with painting or dying wooden eggs.
Instead, I recommend using a pyrography tool to decorate wooden Easter eggs. You retain their natural wood color which adds warmth to your home and Easter decor.
Display them in a rope bowl on a coffee table or on a bed of moss for an earthy touch.
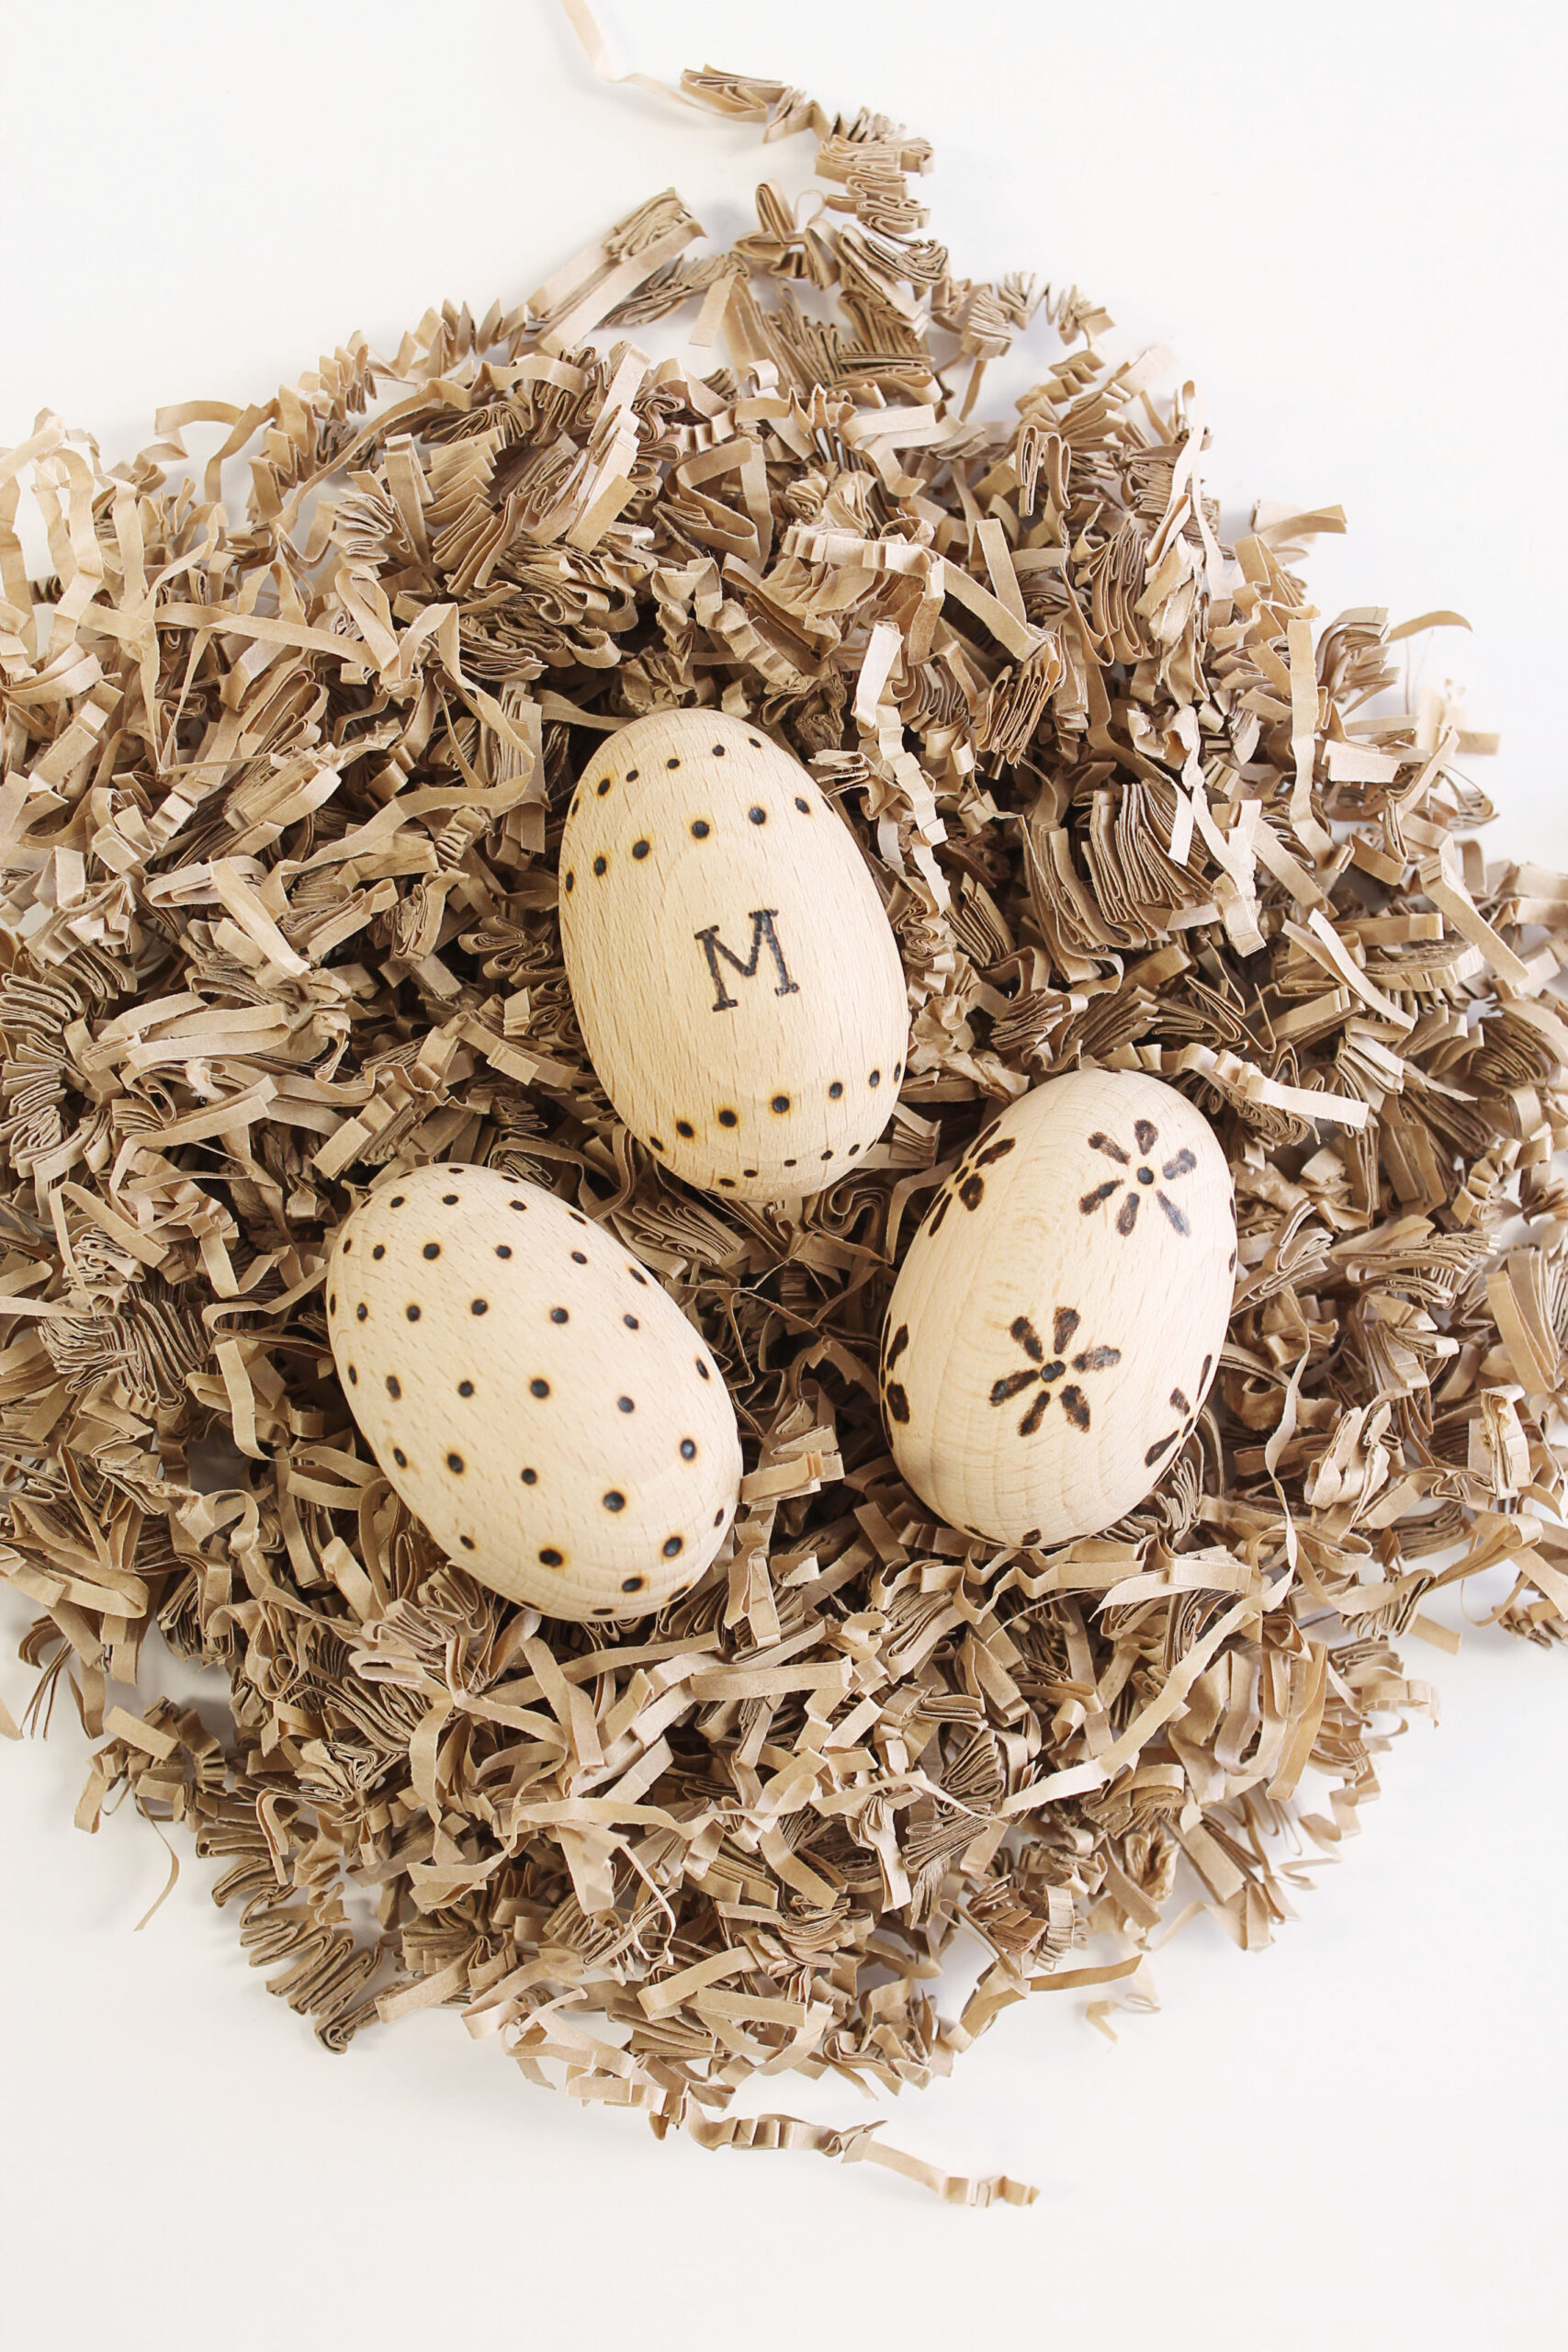
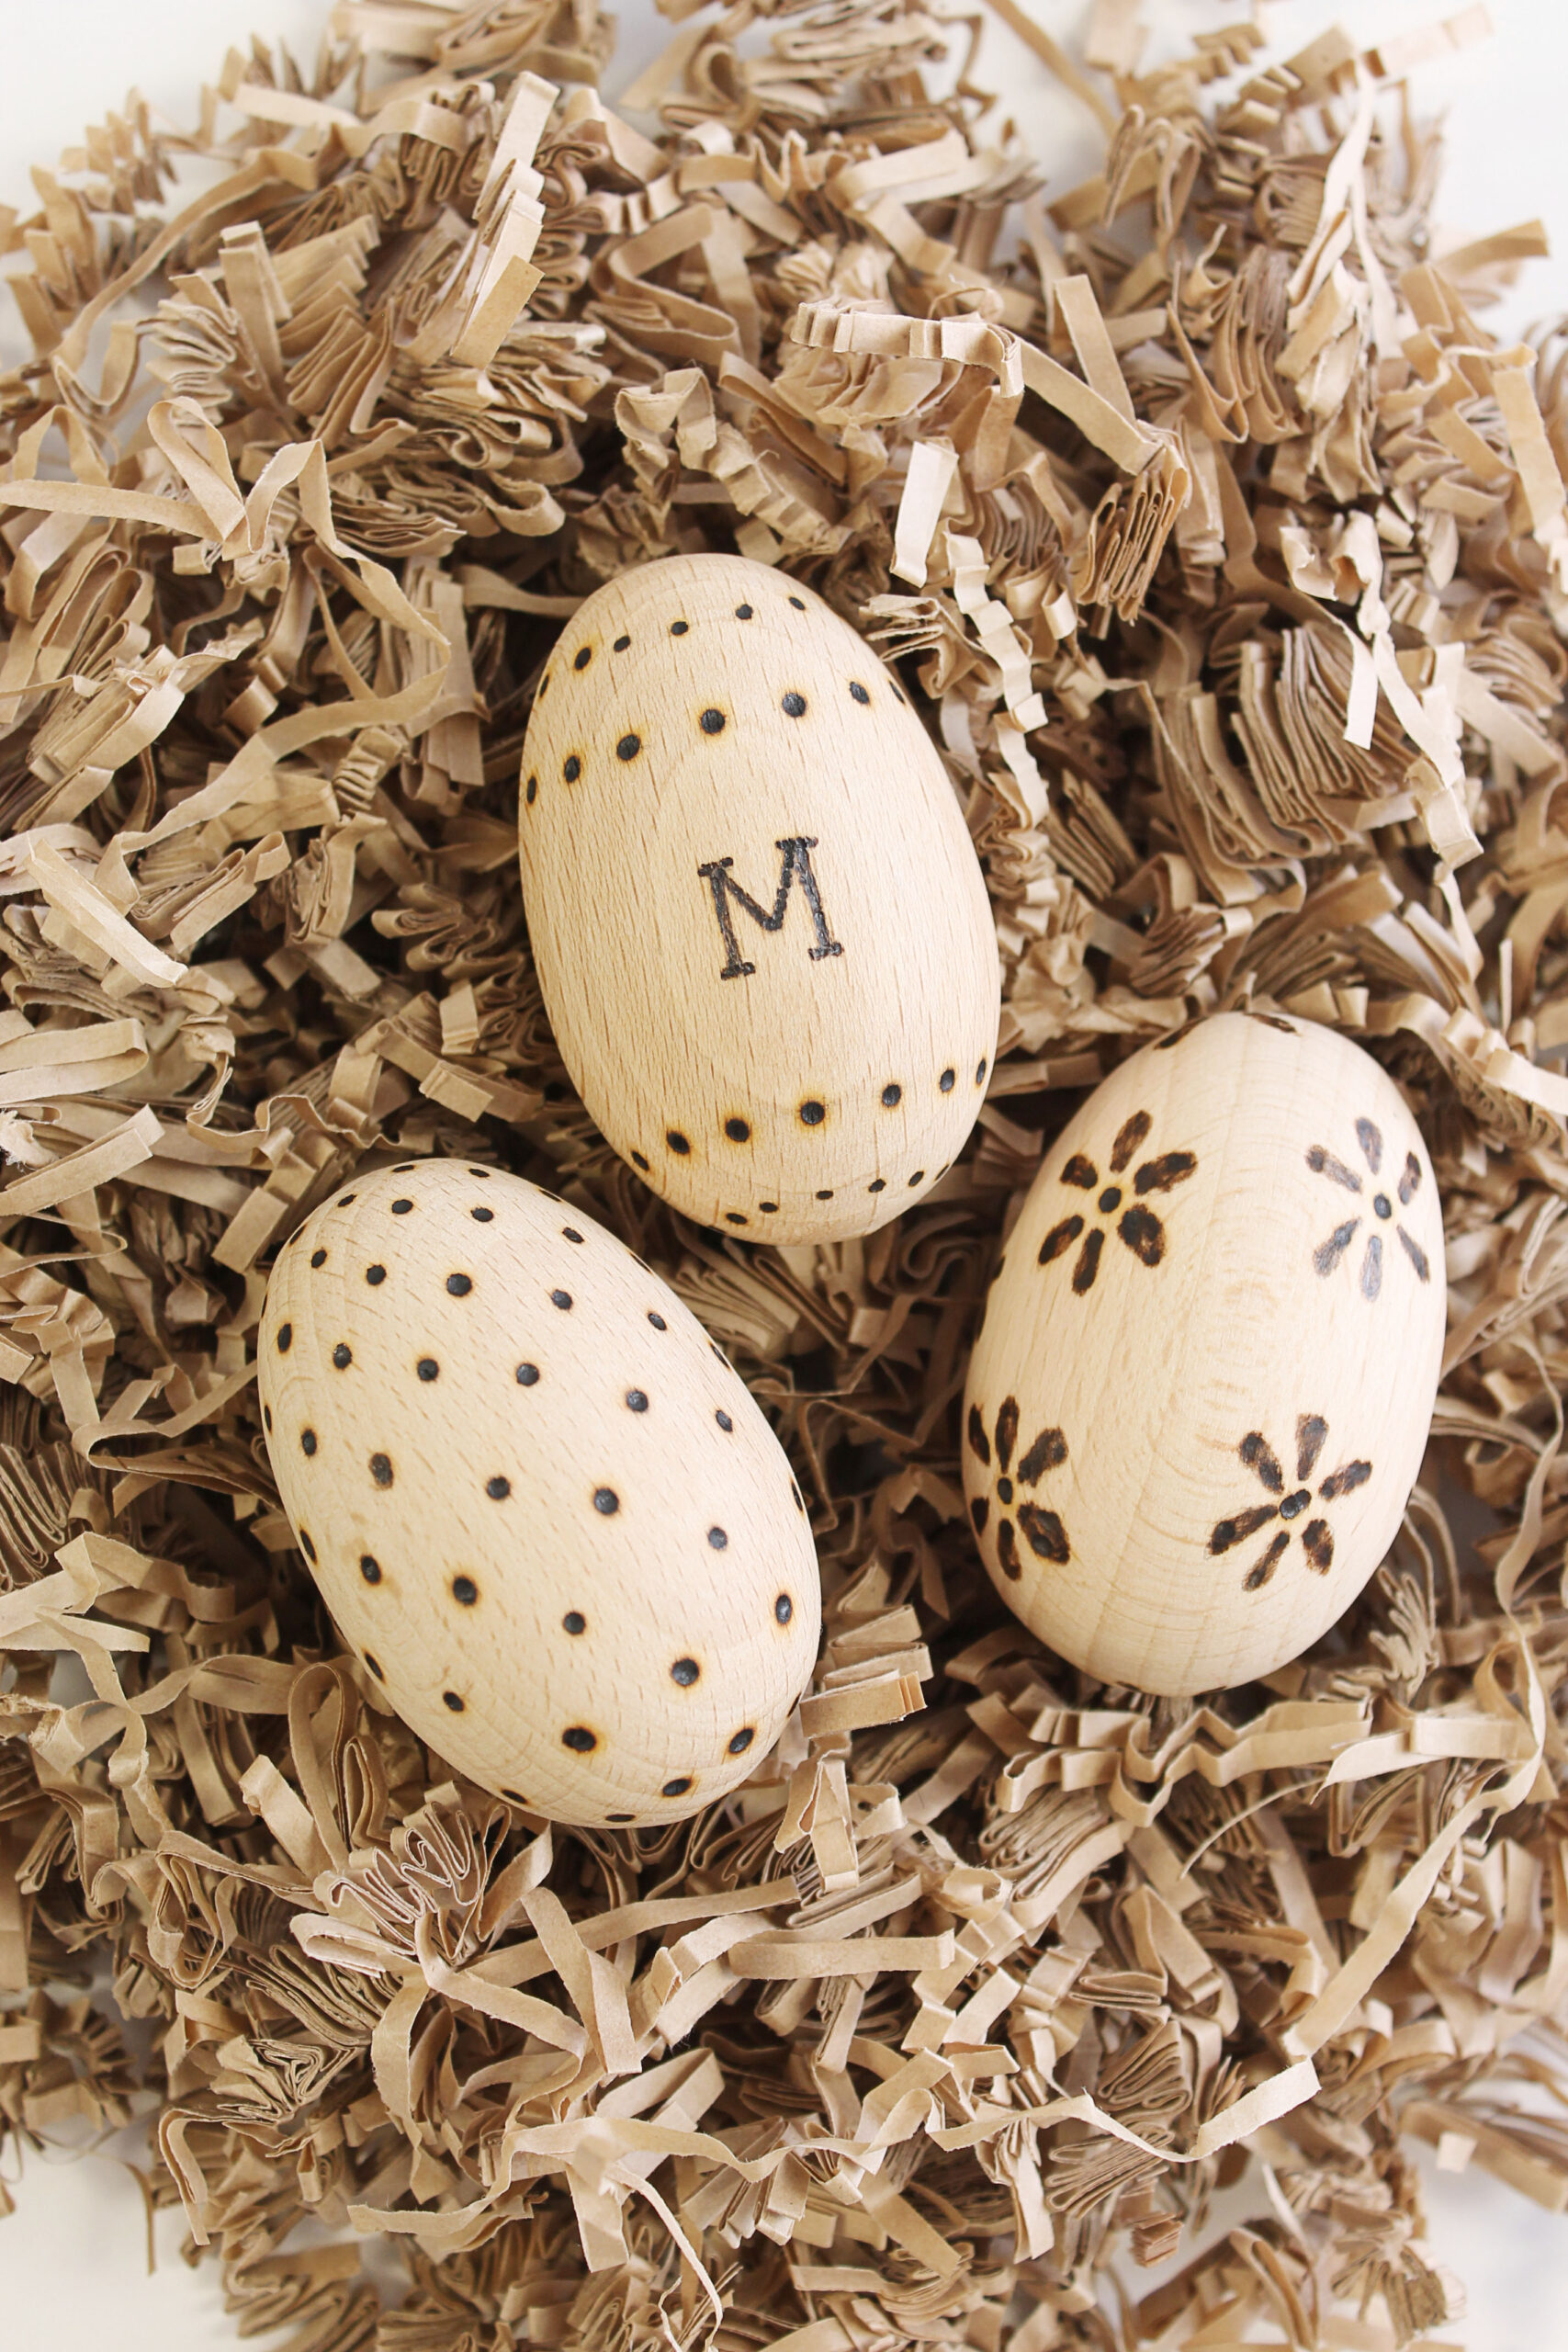
Here, I’ve chosen to make a nest for them from unbleached kraft paper shreds for that eco-friendly continuity.
If you like for your holiday decor to be neutral, soft, tones – this is the perfect spring project for you. Let’s get started!
Materials
- Wooden Easter eggs
- Wood burning tool kit
- Pencil (optional)
Steps
- Use a pencil to draft out design if desired.
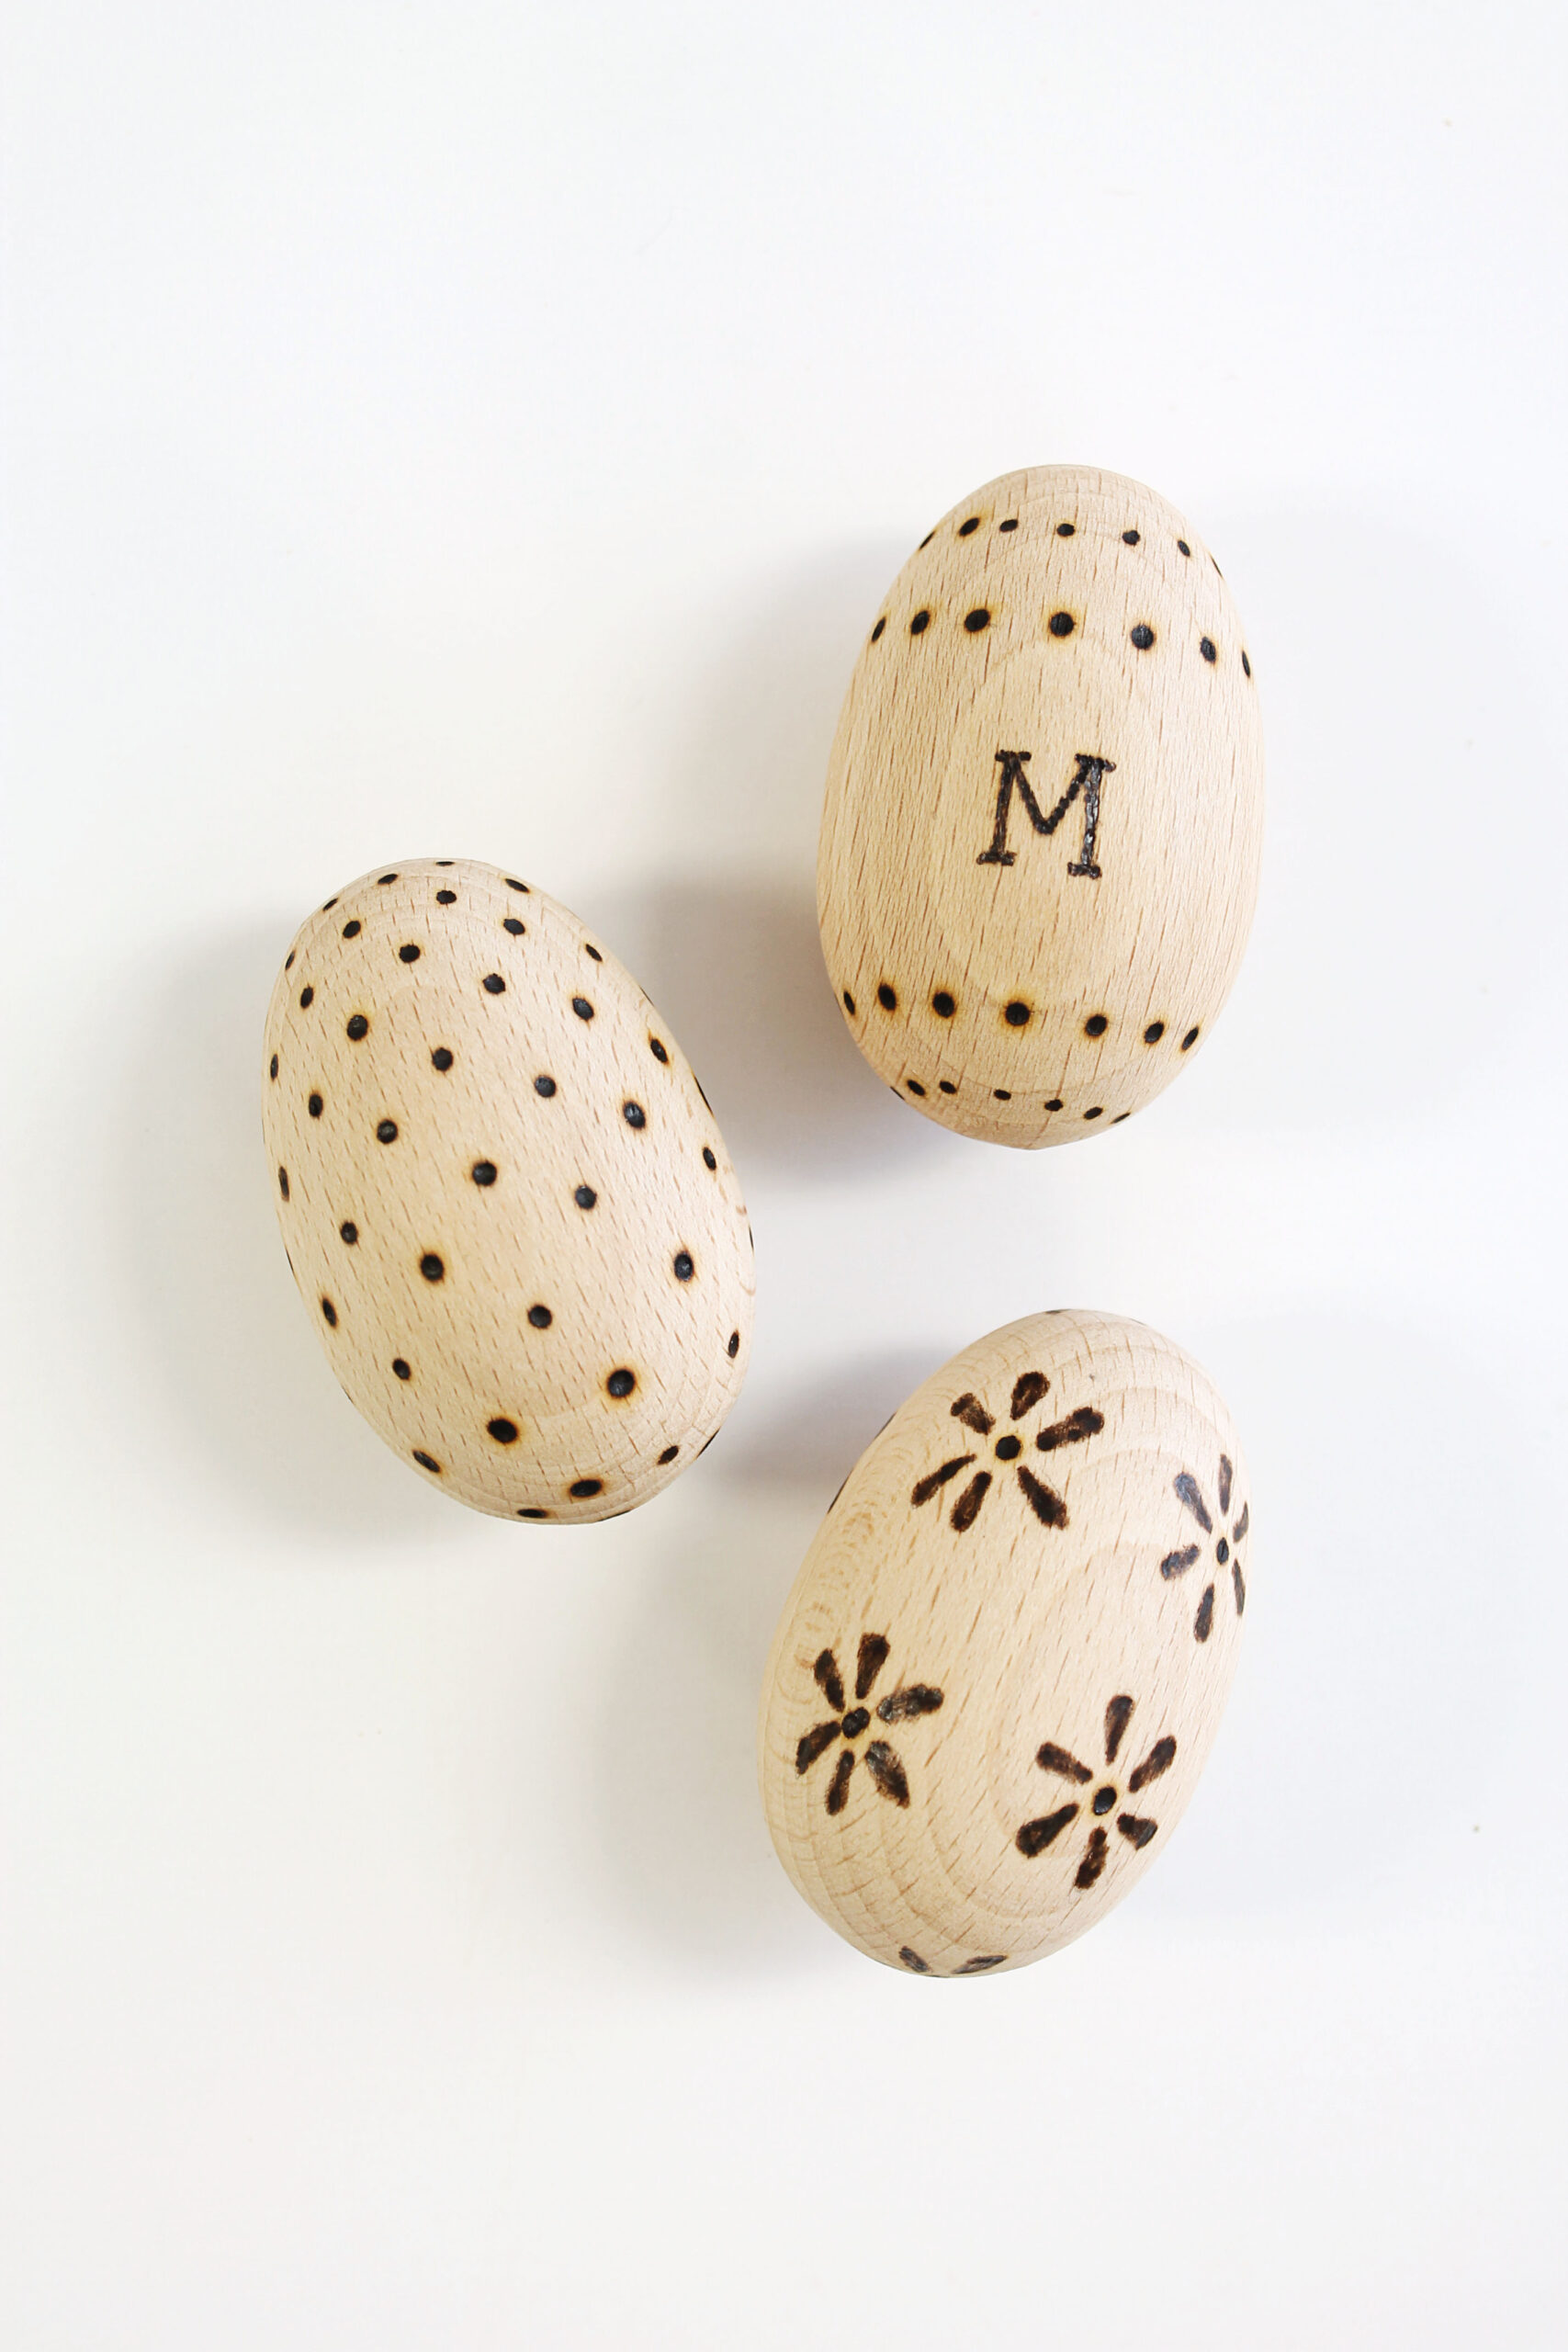
- Use the wood burning tool to make designs on wooden eggs. Here a flow point was used to create the polka dot egg and the floral egg. The flow point was also used to add dotted lines to the monogrammed egg, while a tapered point was used to create the monogram itself.
Tips for getting started with wood burning
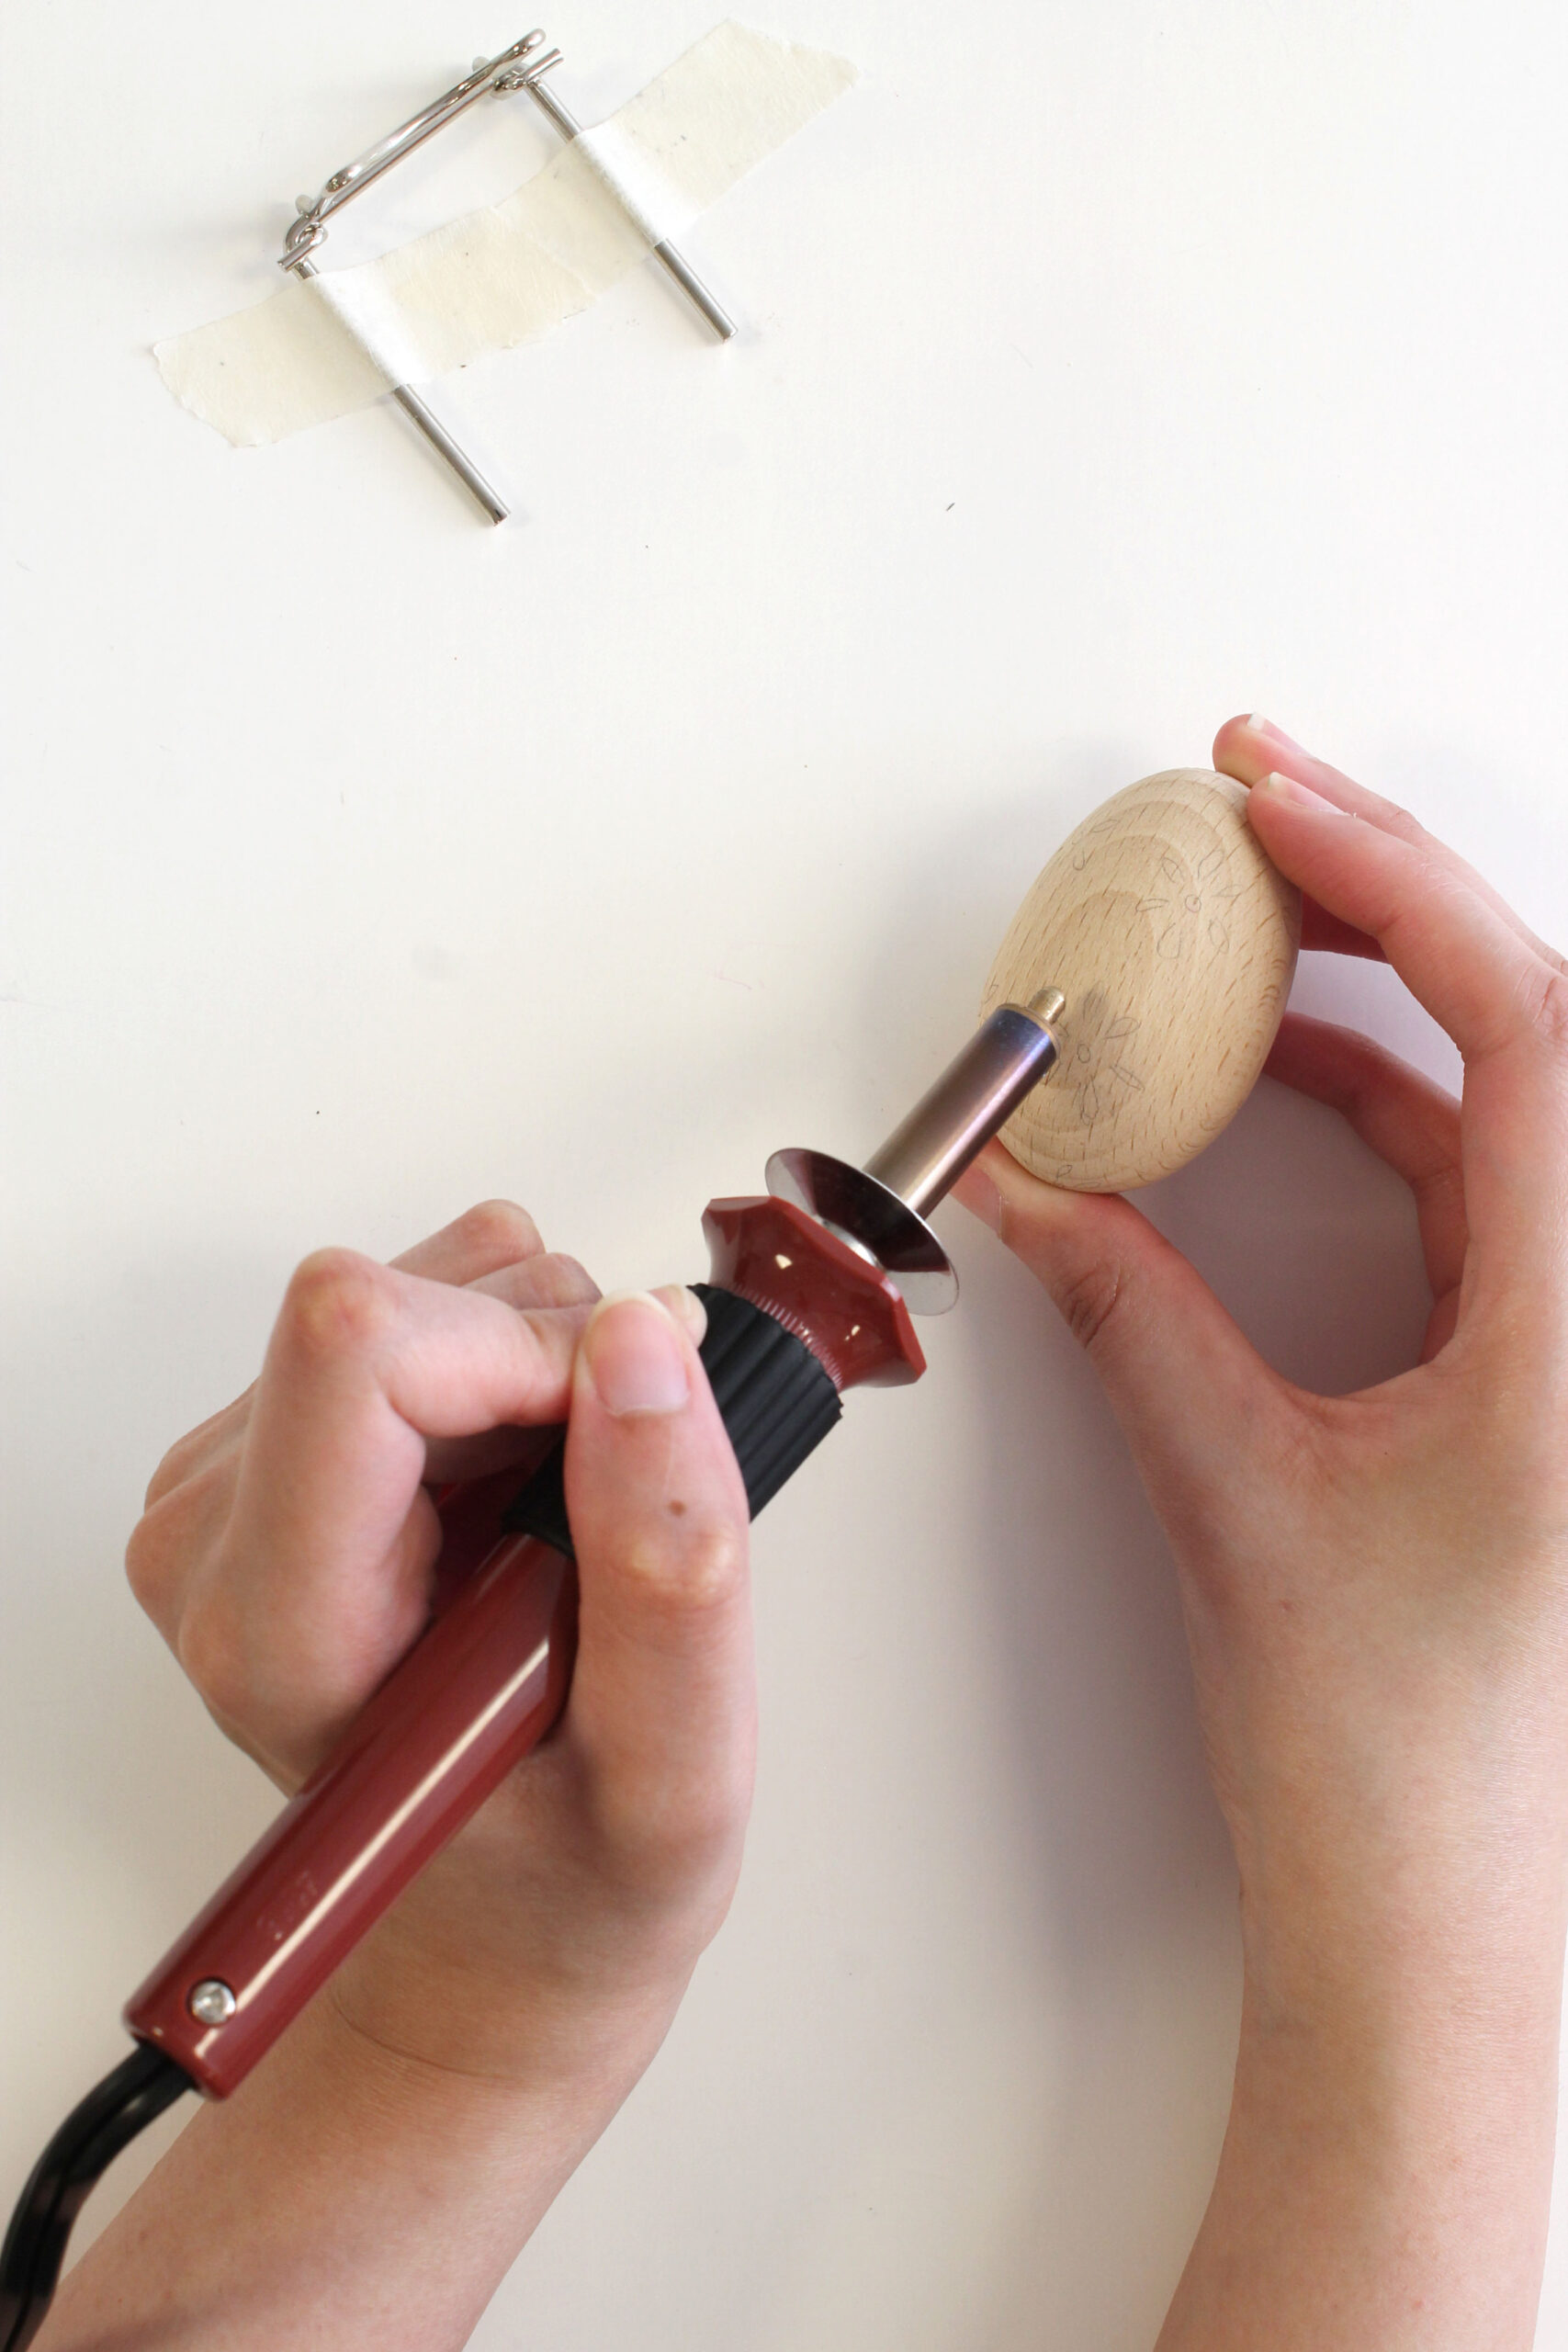
- Tape the metal stand that come with your kit to your table using masking tape. Doing so will make sure it won’t topple over. This is really important because if it does tip over with a hot burner sitting on it, the burner will singe your desk.
- To change the point of the wood burning tool, turn it around like a screw. (Turn to the right to tighten and to the left to loosen.) When the tool is hot, always use flat nosed pliers. When cool, you can use your hands.
- Always keep the wire behind your hand as shown in the photo for safety.
- The longer you press the tool to the wood, the darker your imprint will be.
Tips for making wood burned Easter eggs
The wood’s grain is a huge factor to keep in mind when choosing a design for your Easter egg. Wood burning stripes and squiggles pose a challenge on a curved surface like an Easter egg because they will not appear very precise or clean due to the wood’s grain.
For this project, I found that the Flow Point gave the cleanest look. The flow point is used for dots and I used it to create a polka dot egg, a floral egg and add dotted lines to the monogrammed egg.
The centre of the egg is a bit flatter which allowed me to create a small monogram letter using a few short strokes.
Note: although you can purchase alphabet stamps to attach at the end of your wood burning tools, they might not imprint on a curved surface like an egg.
Did you make this DIY of ours? We’d love to see it! Share with us on Instagram or Facebook @helloholydays.
If you make this DIY and share photos of your version on your own blog, please be sure to include a link back to this page as your source of inspiration and tag @helloholydays on all social media.
Want more Easter ideas? Explore all Easter crafts.
Since you’ve already invested in a pyrography tool for this craft now, you can also use it for making Christmas gifts later in the year! Learn how to make my Scandinavian-Inspired Wood Burned Christmas Ornaments.
Discover what’s new in my shop! Find greeting cards, holiday decor, gifts and more in the Hello Holy Days Shop!